When your AC stops blowing cold air, the most common causes are a clogged filter, low refrigerant, a tripped breaker, a frozen evaporator coil, a malfunctioning thermostat, blocked outdoor unit airflow, a failed capacitor, or a broken compressor. Simple issues like filters and thermostats you can check yourself. Refrigerant leaks, frozen coils, capacitor failure, and compressor problems require a licensed HVAC technician with the right tools and EPA certifications. Attempting DIY repairs on refrigerant or electrical components is unsafe and usually makes the problem worse.
It’s 110°F in Gilbert, and your AC just stopped blowing cold air. The panic is real. You don’t know if it’s a $15 filter or a $1,500 compressor. The last thing you want is to pay a technician $400 just to be told you needed to flip a breaker. Bill and the JLM team have diagnosed thousands of AC failures across the East Valley. With 3,000+ lifetime installs and an A+ BBR rating, we’ve seen every failure mode Arizona heat can throw at a system. Here’s what to check first and when to call a pro.
1. Clogged or Dirty Air Filter
The most common reason your AC stops cooling is also the easiest to fix: a clogged air filter. When dust, pet hair, and Arizona’s notorious cottonwood seeds pack into the filter, airflow drops. Your system runs harder, cools less, and can’t keep up.
In the East Valley’s dusty climate, filters clog fast. The standard recommendation is every 60 to 90 days. But if you have pets or live near agricultural areas, check monthly. A dirty filter costs you money. It forces your system to work harder and waste energy.
How to Check Your Filter in 60 Seconds
Turn off the system. Locate the filter behind a return-air grille on a wall or ceiling, or inside the air handler. Slide it out and hold it up to a light. If you can’t see through it, replace it.
A new filter costs under $20 at any hardware store. Match the size printed on the frame. Slide the new one in with the airflow arrow pointing toward the blower. Turn the system back on. If the air is still warm after 20 minutes, the problem is deeper. Regular maintenance keeps filters fresh and prevents bigger issues.
2. Low Refrigerant or a Refrigerant Leak
Refrigerant doesn’t “run out.” If your AC is low on refrigerant, you have a leak somewhere in the system. Symptoms include warm air from the vents, a hissing sound near the outdoor unit, or visible ice buildup on refrigerant lines.
Refrigerant handling requires EPA certification because it’s a regulated substance. DIY recharging is illegal without proper credentials and equipment, and dangerous. The EPA’s refrigerant phaseout guidance explains that R-22 (Freon) was discontinued in 2020. If your system uses R-22 and has a leak, you face costly replacement refrigerant or a full system upgrade to R-410A.
Why You Can’t Just “Top Off” Refrigerant Yourself
Adding refrigerant without fixing the leak means you’re just postponing the inevitable failure. The system will lose charge again, run inefficiently, and strain the compressor.
A licensed tech uses leak detectors, pressure gauges, and vacuum pumps to find the leak, repair it, evacuate air and moisture from the lines, and recharge the system to spec. The EPA’s guidance on purchasing and repairing home air conditioners makes it clear: only certified technicians can legally handle refrigerant. Trying to DIY this will void your warranty and potentially destroy your compressor.
3. Tripped Circuit Breaker or Blown Fuse
The second-easiest DIY check: your breaker panel. AC systems draw heavy current. Power surges during monsoon storms or grid fluctuations can trip the breaker.
Walk to your breaker panel, usually in the garage or utility room. Find the breaker labeled “AC,” “Air Handler,” or “HVAC.” Check its position. If it’s in the middle or off position, flip it fully off, then back on. Go to the thermostat and listen for the outdoor unit to kick on.
If the breaker trips again immediately, stop. Don’t keep resetting it. A breaker that won’t stay on signals an electrical short, a failing compressor motor drawing too much current, or damaged wiring. Repeated resets can damage the system or create a fire hazard. Call a licensed technician to diagnose the electrical fault.
4. Frozen Evaporator Coil
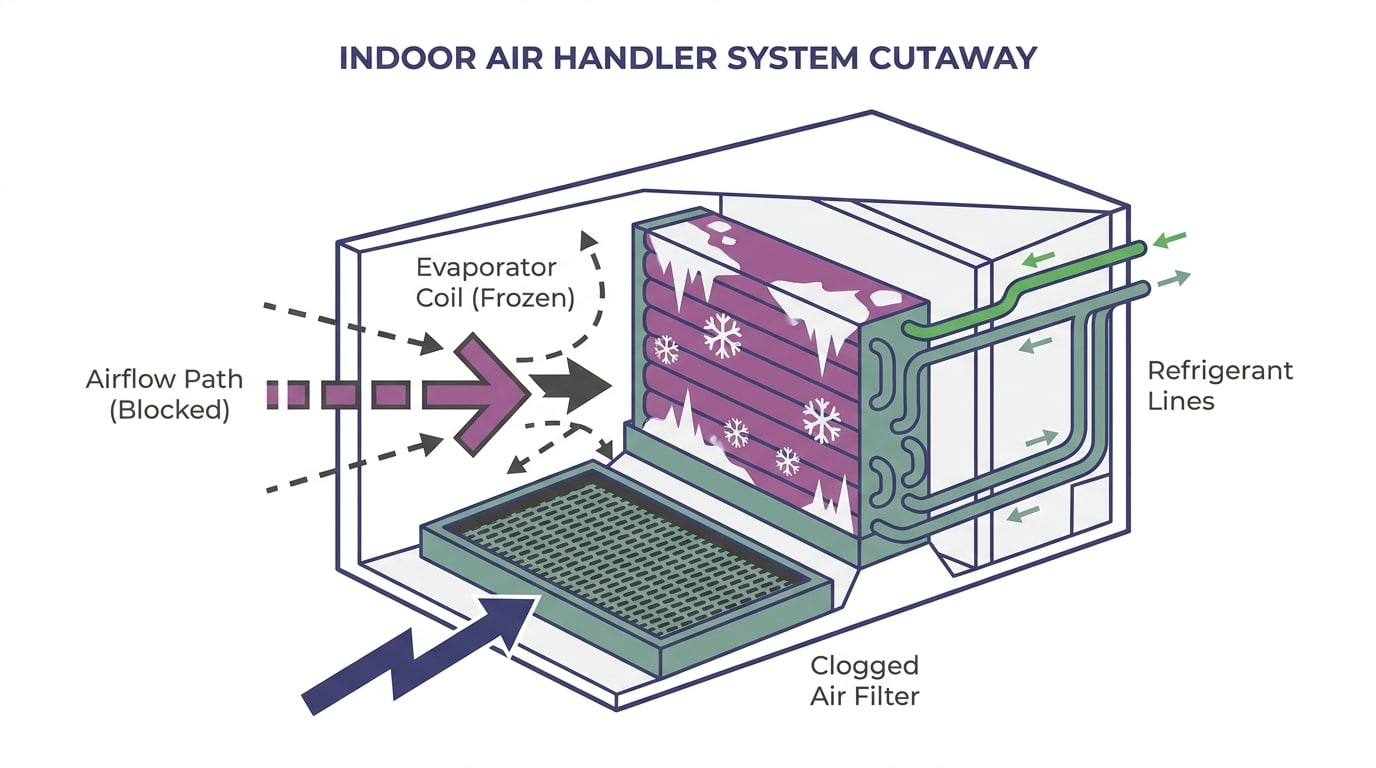
If you see ice forming on the refrigerant lines running to your indoor air handler or coating the coil itself, your evaporator is frozen. The most common cause is restricted airflow.
A clogged filter, closed supply vents, or blocked return grilles prevent warm air from flowing over the coil. Without that heat exchange, the coil’s temperature drops below freezing. Condensation turns to ice. The Energy Star maintenance checklist emphasizes regular filter changes and coil cleaning to prevent airflow restriction.
What a Frozen Coil Looks Like (and Why It Happens)
You’ll see a thick frost or ice shell on copper lines near the air handler. Or dripping water pooling under the unit. Turn the system off. Switch the thermostat to FAN ONLY. Let the ice thaw for 2 to 4 hours.
While it thaws, check the filter. Make sure all supply vents in your home are open. If the coil refreezes after you restart the system, the problem is likely a refrigerant leak (low charge causes the same freezing effect) or a failing blower motor. At that point, a tech needs to measure refrigerant pressure and airflow.
5. Thermostat Malfunction or Incorrect Settings
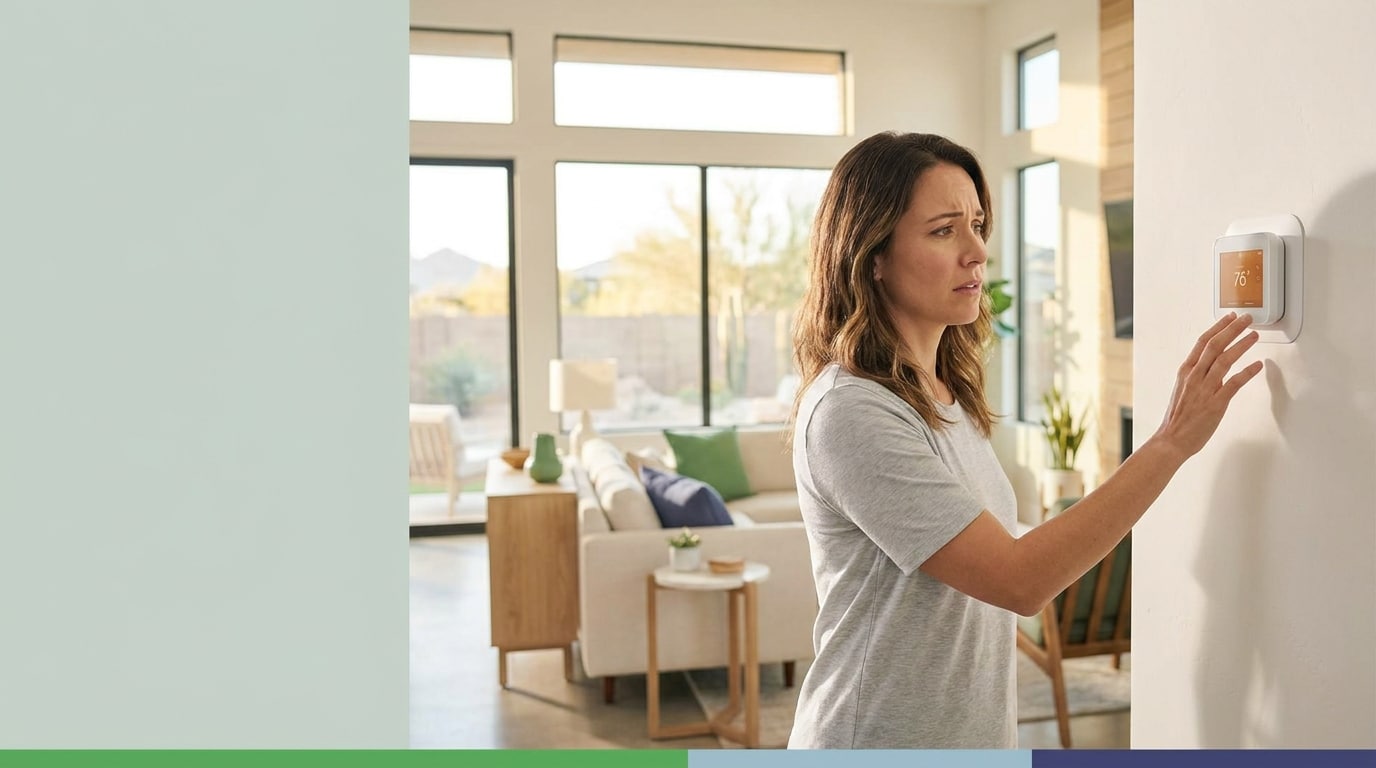
Sometimes the problem isn’t the AC at all. It’s user error or a failing thermostat. Start with the basics: is the thermostat set to COOL mode, not FAN or OFF? Is the temperature setpoint below the current room temperature?
If the display is blank, check the batteries. Many digital thermostats run on AA batteries. Replace them and wait a minute for the system to reset.
Next, check where the thermostat is mounted. If it’s in direct sunlight or near a heat source (lamp, window, kitchen), it can read a false high temperature. It shuts off the AC too soon, leaving the rest of the house warm.
If you’ve verified the settings and replaced the batteries but the system doesn’t respond, the thermostat’s internal relay or wiring may have failed. A tech can test continuity and voltage in minutes and swap the unit if needed. Modern programmable and smart thermostats last 10 to 15 years. Mechanical models fail sooner.
6. Blocked or Dirty Outdoor Unit (Condenser)
Your outdoor condenser unit needs airflow to expel heat. When debris clogs the fins or vegetation grows too close, the unit can’t breathe. In the East Valley, cottonwood seeds, tumbleweeds, dust storms, and overgrown shrubs are common culprits.
Walk outside and inspect the unit. Clear a 2 to 3 foot radius around it. Pull away leaves, weeds, and any debris sitting on top of the unit.
How Much Clearance Your Outdoor Unit Needs
Manufacturers specify at least 24 inches of clearance on all sides. Leave 5 feet above the unit. Anything less restricts airflow and forces the compressor to work harder.
If the aluminum fins on the condenser coil are clogged with dirt, use a garden hose on low pressure to spray them clean from the inside out (top to bottom). Never use a pressure washer. The force bends the delicate fins and reduces airflow permanently.
If the fins are already crushed or the coil is packed with years of grime, a professional coil-cleaning service is the only fix. Proper air conditioning maintenance is critical to preventing cooling failure.
7. Failed Capacitor or Contactor (Electrical Issue)
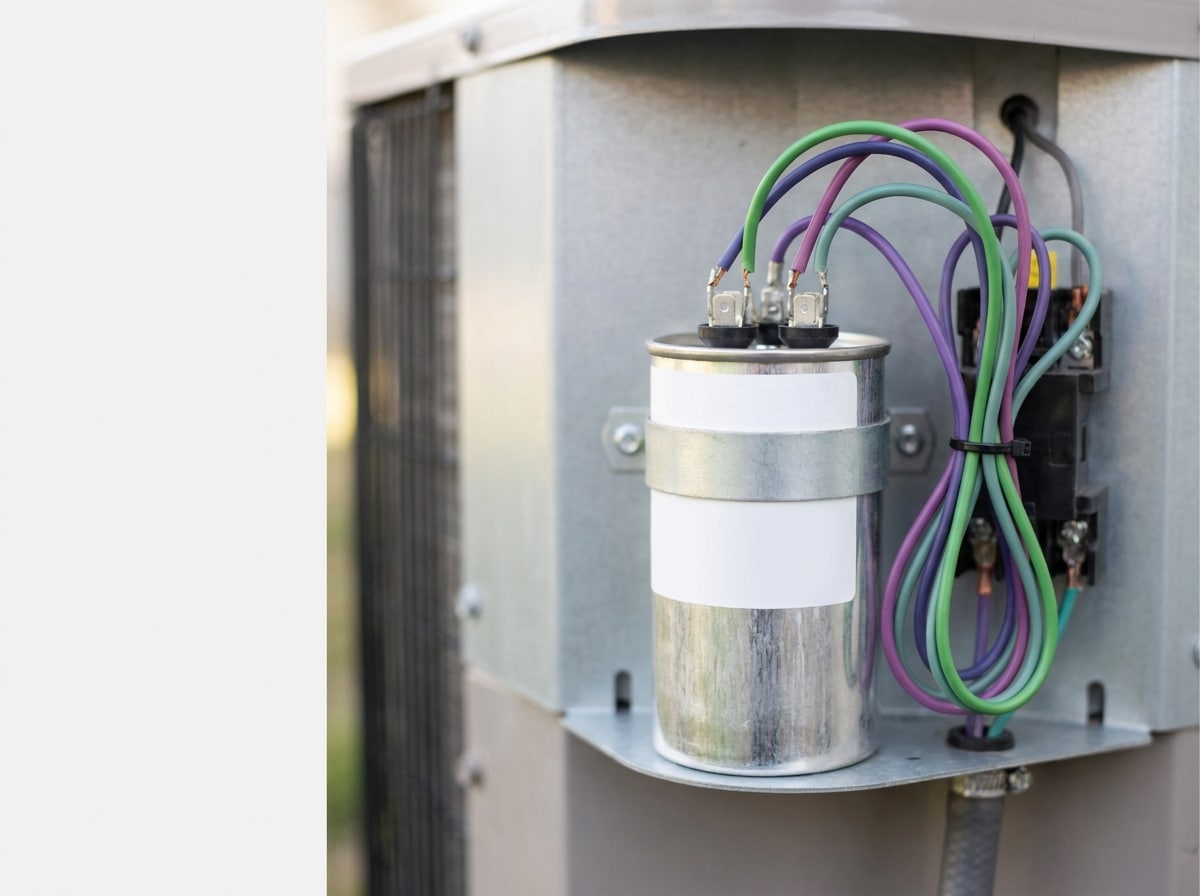
If your outdoor unit hums but the fan doesn’t spin, or the compressor doesn’t kick on at all, the capacitor has likely failed. The capacitor is a small cylindrical component inside the outdoor unit. It stores electrical charge to give the compressor and fan motor the jolt they need to start. When it fails, the motor tries to start but can’t. You hear a hum and get no cooling.
This is not a DIY repair. Capacitors store lethal voltage even when the system is powered off. Touching terminals without discharging the capacitor first can kill you.
A licensed technician can test the capacitor with a multimeter, discharge it safely, and replace it in under an hour. The contactor (a relay that closes to send power to the compressor) can also fail. Symptoms are similar: the outdoor unit doesn’t run, or it clicks but nothing happens. A tech can test and replace the contactor on the same service call. Both are considered routine repairs with fast turnaround.
8. Broken Compressor (the Big One)
The compressor is the heart of your AC. It pressurizes refrigerant and pumps it through the system. When the compressor fails, the system can’t cool.
Symptoms: the outdoor unit doesn’t run at all, or it runs but produces zero cold air. You may hear a clicking sound as the contactor tries to engage, then nothing. Compressor failure is often the result of age, electrical damage, or lack of maintenance. Carrier’s AC lifespan data shows most residential systems last 12 to 15 years. If your compressor fails and the system is over 10 years old, replacement is usually the smarter financial decision than repairing it.
When Compressor Failure Means It’s Time for a New System
Replacing a compressor costs $1,500 to $3,000 for the part and labor. If your system is already 12+ years old, you’re paying premium money to extend a unit that will likely need other expensive repairs soon.
A new high-efficiency system pays for itself through lower energy bills and includes a 10-year parts warranty. Bill and the JLM team offer free consultations to walk you through the replace-vs.-repair math with transparent pricing and no pressure. We’ll show you what a new Amana or comparable system would cost, what your current repair bill looks like, and let you make the call.
Same-day emergency repair is available when you need cooling back fast. Response time matters. Delaying a compressor diagnosis in Arizona summer means days without cooling. That’s not safe for families with young children, elderly residents, or health conditions.
When to Call a Professional vs. DIY
You can handle a few checks yourself: replace the air filter, reset the breaker, swap thermostat batteries, and clear debris from the outdoor unit. Those cost almost nothing and take under 15 minutes.
But refrigerant leaks, frozen coils that refreeze, electrical problems (capacitor, contactor, wiring), and compressor failure require a licensed technician. The EPA’s guidance on repairing home air conditioners is clear: refrigerant handling is regulated, and unlicensed repairs are illegal. Capacitors and compressors carry lethal voltage. YouTube tutorials won’t save you if you don’t have the tools, training, or safety equipment.
JLM offers same-day AC repair and 24/7 emergency service when your system fails at the worst possible time. Bill and his team show up personally. You’re not calling a corporate call center. You’re getting a licensed technician who lives in the East Valley and has diagnosed thousands of these exact failures.
We’ll tell you honestly whether it’s a $15 filter or a $1,200 compressor. No hidden fees, no pressure to replace what can be repaired. That’s the JLM difference.
Conclusion
Your AC stopped blowing cold air, and now you know the eight most common causes: clogged filter, low refrigerant, tripped breaker, frozen coil, thermostat issue, blocked outdoor unit, failed capacitor, or broken compressor. Some you can check in minutes. Others need a licensed pro with the right tools and certifications.
Arizona summer doesn’t wait, and neither should you. Bill and the JLM team have seen every failure mode the East Valley can throw at an AC system. With 3,000+ installs, an A+ BBB rating, and owner-on-the-job accountability, we’ll diagnose your system honestly, fix what’s needed, and get your cooling back the same day.
If you’ve checked the filter, reset the breaker, and cleared the outdoor unit but your AC is still blowing warm air, it’s time to call a pro. Most homeowners can expect to spend between $150 and $600 on average for professional AC repairs. Simple fixes like capacitors sit on the low end. Refrigerant leaks or compressor issues land at the higher range.
Today’s Homeowner reports that typical AC repair costs run from $100 to $650, depending on the component and complexity. We offer transparent pricing, same-day service, and 24/7 emergency response. No corporate upselling, no hidden fees. Just honest HVAC service from people who live in your community.
Industry data shows homeowners spend between $150 and $600 on average for professional AC repairs, with straightforward fixes like capacitor replacement on the lower end and refrigerant leaks or compressor issues running higher. Trane’s guide to choosing an HVAC contractor recommends verifying licenses, checking reviews, and asking for upfront pricing before scheduling service. NATE certification, recognized by leading manufacturers like Carrier, ensures your technician has proven technical competency. That’s exactly what JLM delivers.
Start with the smart way to prep your AC for Gilbert’s hot summer to avoid these emergencies in the first place. Preventive spring AC tune-ups catch airflow issues before they freeze your coil mid-summer.
Understanding how HVAC systems work together helps you troubleshoot thermostat-to-unit communication issues. Why summer AC failures in Mesa and Gilbert require immediate response explains why delaying the call only makes the problem worse.
Professional HVAC certifications, like those outlined by Bryant, confirm your contractor meets industry standards and stays current with evolving technology. Learn more about HVAC services in the East Valley.
For more troubleshooting tips and seasonal maintenance advice, browse our full library of AC troubleshooting and repair articles or check out our HVAC tips and seasonal maintenance guides.
Recent HVAC industry trends show increasing demand for rapid response and transparent pricing, exactly what JLM prioritizes for every customer.
Call now: 602-619-3609